This post is specifically on the risks of the Hep B vaccine.
ABC 20/20 Part 1 The Hep B Controversy
ABC 20/20 Part 2 Hep B Controversy
The religious exemption that the talk about in these videos is an option and from my research publics schools must accept it without question-legally. Private schools do not need to accept the exemption.
Info on Vaccine Exemptions By State
NJ Vaccine Laws
Saturday, March 24, 2012

Friday, March 9, 2012
Lemon Blueberry Muffins
Blueberry Lemon Muffins
Ingredients:
2 cups unbleached all-purpose flour
1 1/2 tsp baking soda
1/2 tsp salt
zest of 2 lemons
3/4 to 1 cup granulated sugar
1 cup nondairy milk
1/3 cup canola oil
1 tsp lemon extract
1 tbsp white distilled vinegar
1 1/2 cups fresh blueberries, picked over to remove stems
Preheat oven to 400 degrees. Lightly grease your muffin tins.
In a medium bowl, combine the flour, baking soda, salt, and lemon zest.
In a large bowl, combine the sugar, milk, oil, lemon extract, and vinegar. Mix well. Add the flour mixture, stirring until the ingredients are just blended. Gently fold in the berries using a rubber spatula.
Fill greased or nonstick muffin tins about two-thirds full. Bake until the muffins are lightly browned and a wooden skewer inserted into the center comes out clean, about 20 minutes. While the muffins are baking, lick the bowl clean. No eggs means no salmonella!
Remove from the oven and let sit for 5 minutes. Remove the muffins from the tins and cool on a wire rack.
Yield: 12 muffins
Ingredients:
2 cups unbleached all-purpose flour
1 1/2 tsp baking soda
1/2 tsp salt
zest of 2 lemons
3/4 to 1 cup granulated sugar
1 cup nondairy milk
1/3 cup canola oil
1 tsp lemon extract
1 tbsp white distilled vinegar
1 1/2 cups fresh blueberries, picked over to remove stems
Preheat oven to 400 degrees. Lightly grease your muffin tins.
In a medium bowl, combine the flour, baking soda, salt, and lemon zest.
In a large bowl, combine the sugar, milk, oil, lemon extract, and vinegar. Mix well. Add the flour mixture, stirring until the ingredients are just blended. Gently fold in the berries using a rubber spatula.
Fill greased or nonstick muffin tins about two-thirds full. Bake until the muffins are lightly browned and a wooden skewer inserted into the center comes out clean, about 20 minutes. While the muffins are baking, lick the bowl clean. No eggs means no salmonella!
Remove from the oven and let sit for 5 minutes. Remove the muffins from the tins and cool on a wire rack.
Yield: 12 muffins
Sunday, January 22, 2012
Bean, Kale, Rice & Sausage Soup
~~~~~~~~~~~~~~~~~~~~~~~~~~~~~~~~~

-
- 1/2 cup dry white navy beans, soaked overnight and rinsed
- 1/2 cup Jacob's Cattle Beans (Kidney beans would be fine), soaked overnight and rinsed
- 1/2 cup brown rice, soaked overnight and rinsed
- 1/2 pound venison sausage (Any sausage of your choosing is fine, and you could easily use 1/4 pound.)
- 6-8 cups vegetable or chicken broth/stock
- 2 bay leaves
- 1 large onion, chopped
- 4 cloves garlic, chopped fine
- 1/2 bunch of kale, chopped (we like it chopped fairly small)
Directions:
This soup has a simple list of ingredients, but the flavor is rich and complex.
1. In a large stock pot, add the soaked beans, bay leaves and stock. Bring to a boil, turn heat down to medium high and cook for 45 minutes. Skim any foam off the top as the cook. Add the brown rice and continue to cook until the beans are tender. Add a little more water if necessary. Don't worry if the rice is not 100% cooked at this point.
2. Once the beans are cooked, carefully pour the beans, rice and liquid to a large bowl.
3. In the soup pot, saute the sausage until about 1/2 way cooked (using your spatula or a wooden spoon to break up the sausage really fine), add the onion and continue to saute until sausage is fully cooked and onion becomes tender. Add the garlic and saute for one more minute. Drain off fat, if there is any, and if that is your preference.
4. Carefully add the beans and rice back to the soup pot. Bring just to the boiling point then turn down to low and simmer, covered, for about 15 minutes.
5. Add the chopped kale and stir. Cover the pot again and simmer for another 5 minutes or so. Serve.
I don't serve this with cheese but some Italian cheese would be lovely on top.
As with most soups, a bit of resting time (with the heat off) helps to marry the flavors even further. I hope you enjoy this soup, it is a new favorite in our home. You could substitute a few slices of bacon for the sausage. Also, this could easily be made vegetarian but would lack the smokiness the sausage brings.
Mushroom Barley Patties
Greek Inspired Mushroom Barley Patties

There is a little restaurant that Joel and I love to go to at the coast. It has some whole grain options and a lot of gourmet choices. Last time we were there, Joel got a barley burger that he liked a lot. Of course, I had to go home and learn how to make it myself! He thinks that mine is even better. 
We found that we liked it with pita bread instead of a hamburger bun. It was a little bready with the bun. Besides, this patty has definite Greek leanings which makes it a natural fit with pita bread. The other advantage is if the patty starts to fall apart (like it did at the restaurant and at home), the pita will catch all the loose pieces.
These patties are flavored with parsley and mint, a classic Greek combination. The mint makes it very flavorful, but is optional. You do need a food processor for this recipe.
Greek Mushroom Barley Patties -makes eight medium sized patties, serves 4
Ingredients:
1 pound of mushrooms, cleaned with a mushroom scrubber or wet cloth, stems trimmed
1 1/2 cups of cooked barley (I use hulled barley instead of pearled barley. It takes longer to cook, but is a whole grain with more nutritional advantages. I soak it in water overnight, rinse, then put in a pot with enough water to cover well. I simmer for 40-60 minutes until tender. I like to get this step done earlier in the day).
Several tablespoons of butter or oil
A large handful of washed parsley with the stems cut off (about one cup)
A small handful of washed mint, stems cut off (about 1/4 cup)
1 egg
2 Tablespoons of champagne vinegar
1 teaspoon of salt
1/2 teaspoon pepper
1 pound of mushrooms, cleaned with a mushroom scrubber or wet cloth, stems trimmed
1 1/2 cups of cooked barley (I use hulled barley instead of pearled barley. It takes longer to cook, but is a whole grain with more nutritional advantages. I soak it in water overnight, rinse, then put in a pot with enough water to cover well. I simmer for 40-60 minutes until tender. I like to get this step done earlier in the day).
Several tablespoons of butter or oil
A large handful of washed parsley with the stems cut off (about one cup)
A small handful of washed mint, stems cut off (about 1/4 cup)
1 egg
2 Tablespoons of champagne vinegar
1 teaspoon of salt
1/2 teaspoon pepper
Directions:
Preheat oven to 425 degrees
Preheat oven to 425 degrees
Process mushrooms in a food processor by pulsing until coarsely chopped.
Heat oil/butter in a large skillet over medium-high heat until hot. Add your mushrooms. Stir continuously until mushrooms are just starting to brown any released water from the mushrooms is evaporated.
Now add your cooked mushrooms and barley, parsley, mint, salt, vinegar, and pepper into the food processor. Pulse until well blended. With processor running, add egg (this is to prevent the egg from cooking if the mushrooms are still hot). Your mixture should now resemble something like ground beef.
Heat oil/butter in a large skillet over medium-high heat until hot. Add your mushrooms. Stir continuously until mushrooms are just starting to brown any released water from the mushrooms is evaporated.

Now add your cooked mushrooms and barley, parsley, mint, salt, vinegar, and pepper into the food processor. Pulse until well blended. With processor running, add egg (this is to prevent the egg from cooking if the mushrooms are still hot). Your mixture should now resemble something like ground beef.
Form into eight patties and put on a pan lined with parchment paper.

Cook for around 15 minutes, checking them at ten minutes and every five minutes after. Patties should be firm, but still moist when done.
Serve with warmed pita bread, avocados, cucumber yogurt sauce, tomatoes, and lettuce or sprouts. Enjoy!

Broth of the Week: Pasture Raised Chicken Bone Broth
This is from the Blog Recipes To Nourish-one of my favorites recently:) Enjoy!
Pastured Chicken Bone Broth

What is bone broth? It is a nourishing, homemade broth that cooks for 24 hours. Yes, 24 hours. The long cooking time helps break down the bones and release all of the essential nutrients, leaving you with a beautiful broth.
Bone broth is probably one of the most nourishing and healing foods you can consume. Traditionally in Asian cultures, a fish bone broth is the first thing served to women after giving birth. It is so nourishing that post-partum women consume it before any other food. It helps her heal faster and nourish her body.
Why is it good for you? Bone broth is better than a vitamin supplement because the vitamins and minerals are readily available for your body to use. It’s known for having healing properties, replenishing and nourishing the body when sick, healing the gut, helping with joint pain and arthritis, strengthening your bones, and even helps withcellulite.
For more information on Bone Broth, check out Sally Fallon’s article, “Broth Is Beautiful.”
Pastured Chicken Bone Broth
The “how-to-cure-everything” nourishing broth.
Equipment: 6-quart (or larger) Enamel or Stainless Steel Stock Pot, Juicer (optional), Large Straining Colander, Large Bowl or Large Measuring Cup
- Bones of 1-2 pastured chicken carcasses (leftover bones from roasting a whole chicken work great)
- Neck, feet, and/or head of pastured chicken (optional – I know, sounds gross, but there are a lot of nutrients in the feet and head)*
- ¼ cup organic unfiltered apple cider vinegar
- Juice of ½ lemon (if you have Meyer lemons, use them, they have a great flavor)
- 7-10 fresh organic Shiitake mushrooms (optional – these have medicinal properties and are immunity-enhancing)
- 10 sprigs fresh thyme or 2 tablespoons dried thyme
- 1 sprig fresh rosemary
- 1 sprig fresh marjoram (optional)
- 3-4 cloves fresh garlic or 2 green garlic – if in season, cut in half
- 2 strips kombu (See Resources – Sea Vegetables)
- 1 strip wakame (See Resources – Sea Vegetables)
- 4 strips Astragalus root (optional – nourishes the immune system)
- 4 carrots, scrubbed, not peeled
- 4 celery stalks w/ leaves
- Filtered water, enough to cover everything in pot
*** Do NOT salt until the end of cooking time.***
1. Add bones/carcass, neck/feet/head if you have them, water, vinegar, lemon juice, mushrooms, herbs, garlic, sea vegetables, and Astragalus root.

2 Small Pastured Chicken Carcasses

2. Let soak at room temperature for 45 minutes to 1 hour. This step (the vinegar and lemon) helps draw out nutrients from the bones.
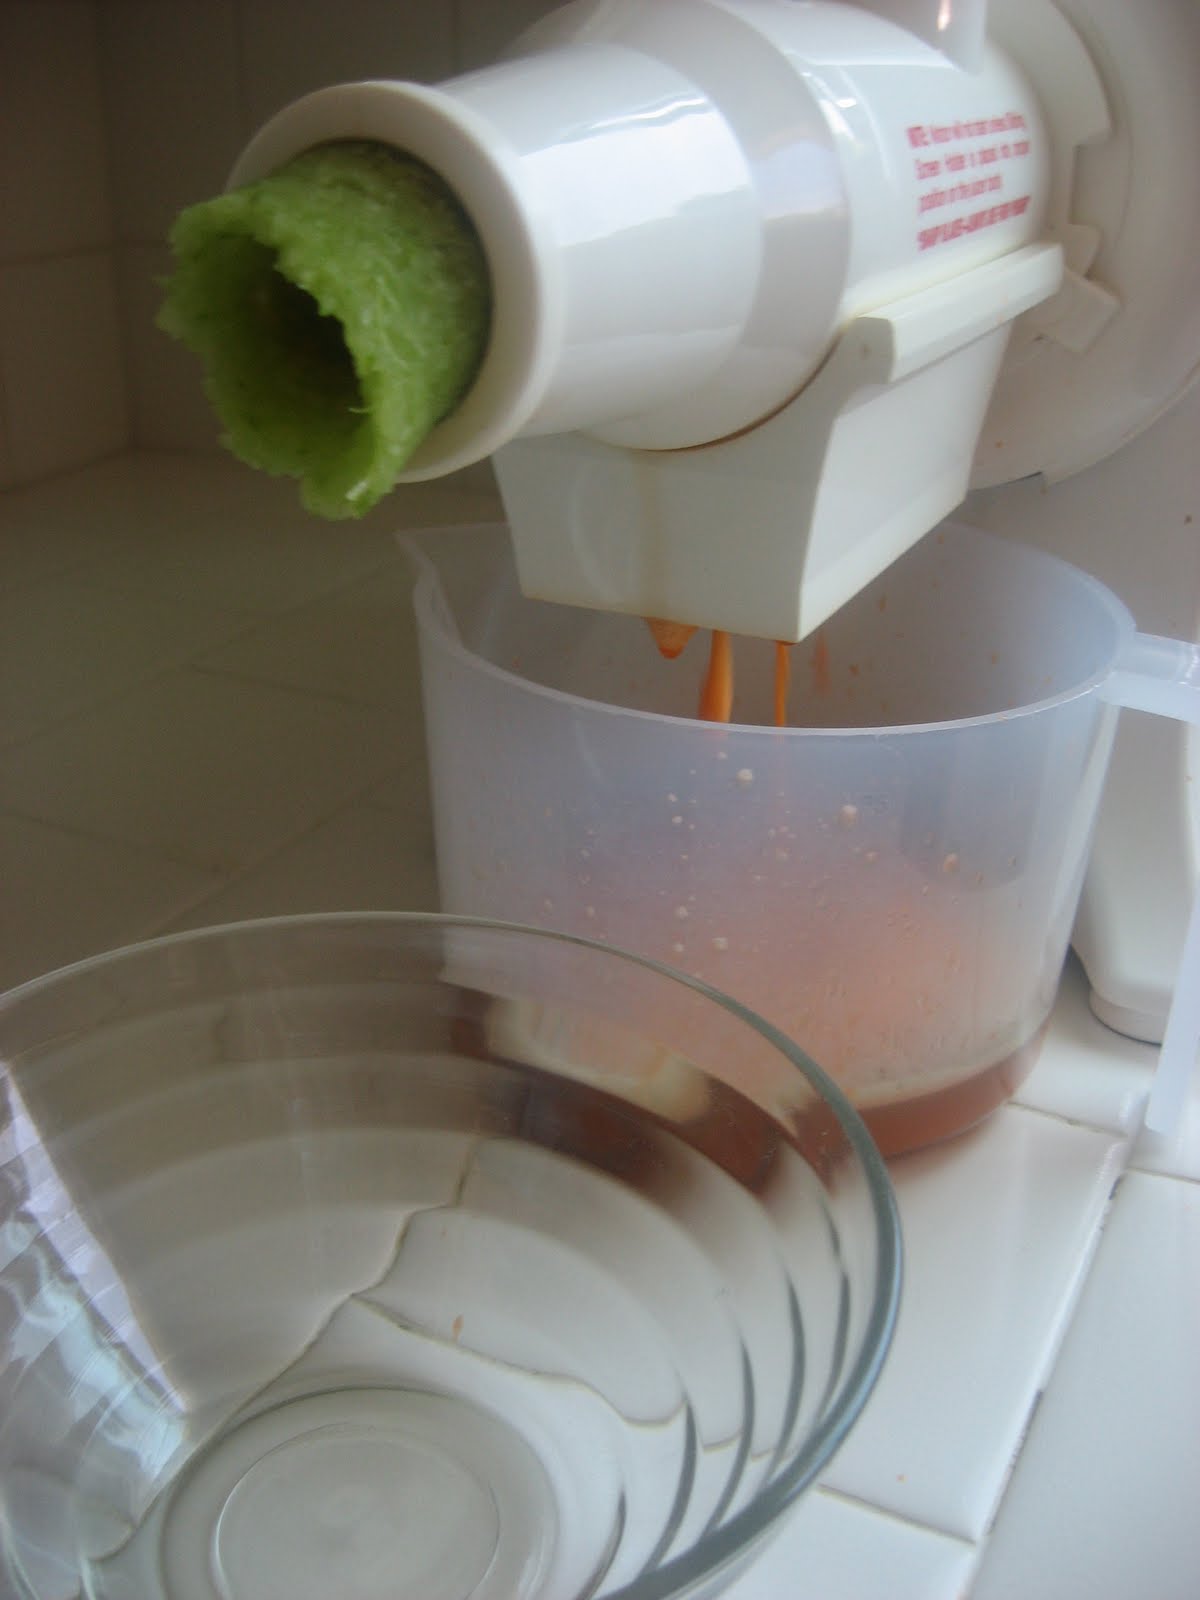
3. Option 1: If you have a juicer, juice all carrots and celery. Take the juice and leftover pulp and add this to the pot. Option 2: If you don’t have a juicer, break the carrots and celery in half and add to the pot.


4. Cover, bring to a boil, and reduce heat to simmer on low heat for 24 hours. Make sure it remains simmering through the whole cooking process.
5. At 12 hours, you can take a potato masher and mash everything in the pot. The bones should start to be soft at this point and start to break down, allowing you to release some of the marrow.
6. At 24 hours, remove from heat, strain through large colander into large bowl or large measuring cup (I use one 12 cup measuring cup and one 4 cup measuring cup.)

7. Cool in refrigerator or cold ice bath – store in refrigerator.
8. Once cooled, you can store portions in BPA-free ice cube trays, or freezer bags. Freeze whatever you won’t use within 3 days.
*Making the bone broth with the head or feet will make a more gelatinous broth, which is very healing and loaded with nutrients.
Yield: Varies, makes about 12-14 cups.
Other Additions: Sometimes I love to add 2 tablespoons chili powder and 1 tablespoon cumin to the broth. These spices add a delicious flavor. I also like to add fresh dill from time to time when I have some on hand.
Storage: Store portions in BPA-free ice cube trays (which will equal about 2 tablespoons per cube) or in 1-2 cup portions in freezer bags. This will come in handy when you’re cooking and you just need a couple of tablespoons of liquid or 1 cup of liquid, etc.
Notes: Drink at least 1 cup daily. Remember to season with unrefined Celtic sea salt since there is no salt in the broth.
Use: In soups for your stock, chicken or meat dishes, veggie dishes, etc.
Tips: If you’re not comfortable cooking this for 24 hours, cook for 12 hours, it will not be a true “bone broth” but will still be nourishing and delicious. Also, when you roast a chicken, save the carcass/bones and freeze in freezer bag. This way you will have bones available to you when you need to make bone broth.
Happy Cooking!
Thursday, January 19, 2012
Sushi -Fun to make with toddlers!
Disclaimer: I have never read how to make sushi or have taken a class!
This is how we make it at home and it tastes great!
Recipe to make your own sushi:
Cooked and cooled rice-works great with left overs:)
Organic Sushi Nori-We use Emerald Cove Brand

Fillings-
Sliced avacado
Sliced cucumber
Shredded carrots
Cream cheese
Sliced or Shredded Veggie of Choice
You can also use sushi-grade tuna and salmon for mommies rolls
Toppings-
I make up a batch of spicy mayo for my rolls
Mayo/Veganiase
Shiracha or chili sauce
*mix the chili sauce into mayo to taste!
Naturally fermented sauce sauce
Pickled ginger (we don't use this)
All you need to make sushi is one of those wooden sushi rollers and a small bowl of water with a food brush.
1. Place Nori on Sushi roller
2. "Paint" water all of the Nori to soften it up *Toddler part!
3. Place Rice in the center of the Nori *Toddler Part!
4. Top Rice with veggies of choice (and fish for mommy rolls) and cream cheese/spicy mayo *Toddler Part!
5. Fold over one side of the Nori with the sushi roller and press tightly in to make a roll shape with that end. Continue rolling to the end of the Nori.
6. Slice the Sushi roll in 5-6 pieces
7. Dip in soy sauce or spicy mayo
Enjoy!!
This is how we make it at home and it tastes great!
Recipe to make your own sushi:
Cooked and cooled rice-works great with left overs:)
Organic Sushi Nori-We use Emerald Cove Brand
Fillings-
Sliced avacado
Sliced cucumber
Shredded carrots
Cream cheese
Sliced or Shredded Veggie of Choice
You can also use sushi-grade tuna and salmon for mommies rolls
Toppings-
I make up a batch of spicy mayo for my rolls
Mayo/Veganiase
Shiracha or chili sauce
*mix the chili sauce into mayo to taste!
Naturally fermented sauce sauce
Pickled ginger (we don't use this)
All you need to make sushi is one of those wooden sushi rollers and a small bowl of water with a food brush.
1. Place Nori on Sushi roller
2. "Paint" water all of the Nori to soften it up *Toddler part!
3. Place Rice in the center of the Nori *Toddler Part!
4. Top Rice with veggies of choice (and fish for mommy rolls) and cream cheese/spicy mayo *Toddler Part!
5. Fold over one side of the Nori with the sushi roller and press tightly in to make a roll shape with that end. Continue rolling to the end of the Nori.
6. Slice the Sushi roll in 5-6 pieces
7. Dip in soy sauce or spicy mayo
Enjoy!!
Thursday, November 17, 2011
Traditional Diets
I found myself reading about traditional diets this month. It was my intent to get to the bottom of vaccinations (or at least as far down as I was comfortable with), but that one goal ended up taking me on a journey of doubting my whole "dieting" lifestyle!
About 3 years ago I was done with dieting and decided to focus on being as healthy as I could. This goal landed me in the middle of Vegetarian World starting with the book Skinny Bitch. I really just picked up the book at Barnes and Noble to flip through it and see what it was all about, but I ended up buying the book, throwing away all of my meat and watching countless videos on Youtube about dairy and meat farms. The idea was simple-humans were not meant to eat animals or their products. This made sense to me-I mean, humans do not have the physical attributes to catch wild animals like other omnivores, we had to get smart enough to make arrows and knives to hunt them down. Then there is the milk and dairy product thing-you have to get a cow pregnant just to get her milk! Of course there were the studies that showed saturated fat was the devil and the less you ate, the longer you lived.
So I was all happy and content on my animal "less" (always had a hard time staying away from the ice cream and cheese!) life, then 2 initially un-related things happened. 1. I decided to stop being told to vaccinate and do my research on the actual "big deal " of vaccinations. and 2. I decided to finally do something about all my cavities that have been getting progressively worse since the birth of my son.
It didn't take me long to realize vaccines are gross and filled with nasty chemicals I wouldn't want around my son let alone injected into his blood stream. And it only took 2 teeth being filled to decide I wasn't filling anymore! These two seemingly un related subjects actually had one major thing in common-Diet.
If I wasn't going to vaccinate ( I am being brave admitting this as I know it is a controversial subject) and I didn't want anymore fillings, what would I do to be naturally healthy enough to not worry about infectious disease or a root canal?? That's what brought me to Nourishing Traditions, a "cookbook that challenged the politically correct nutrition and diet dictocrats."
I should stop here and say, that I have recently read a lot of information about the effectiveness and immunity "shelf life"of vaccinations. Enough for me to feel comfortable knowing opting out of them wasn't putting my son or anyone else at risk. So it really was just a matter of being able to put my family in the position to be strong enough health-wise to prevent and fight off common illnesses and stop using doctors as a crutch of sorts to relieve our diet-induced aliments-such as tooth decay!
The book Nourishing Traditions By Sally Fallon sums up a study conducted by Dr Weston Price in the 1930's!!! (Hello 80 + years ago people!!) Dr Price was infact, a dentist who traveled the world studying the traditional (or never industrialized/processed/commercialized) diets of people all over the world. His findings concluded that teeth were never meant to decay, and that by simply following a traditional and un-processed diet transferred into perfectly straight, white teeth (no brushing even needed) and superb disease-free physical condition throughout life.
While each civilization had different diets based on their location, they all had a few key things in common that Price and Sally Fallon from the Price foundation (author of Nourishing Traditions) would come to promote as essential to being healthy. These commonalities included:
1. A diet rich in saturated fat and cholesterol (from healthy pasture raised animal)
2. Proper preparation of whole un-processed grains and legumes
3. High intake of vitamin A and D
4. Lacto-fermented products
(More on these 4 key components of the traditional diet later.)
Of course, this book sites several studies that show saturated fat and cholesterol are not to be feared. Their point that humans have lived healthy for thousands of years of the land and animals and never seen such diseases such as heart disease and cancer until the introduction of processed and refined foods makes total sense. The more I have searched the internet for info on Traditional Dieting the more I realize, this is also a highly controversy subject! It seems to be The China Study (the main study all vegetarians often reference) vs. the Weston Price Study.
This diet seems a little "extreme" at first as there are very strict guild lines about the quality and preparations of your food. It is about making EVERYTHING from scratch and involves much preparation and forethought. However, a I am beginning this new journey and can easily say the first step to becoming healthier-whether by eating more traditionally or not is ditching the packaged foods.
I encourage you to take a look into traditional dieting! Not because I think you should embrace it, but because it is something that has really been brushed behind a curtain and never talked about on tv and in mainstream books. It is something worth looking into if you already eat animal products or have only heard one side of the food story.
About 3 years ago I was done with dieting and decided to focus on being as healthy as I could. This goal landed me in the middle of Vegetarian World starting with the book Skinny Bitch. I really just picked up the book at Barnes and Noble to flip through it and see what it was all about, but I ended up buying the book, throwing away all of my meat and watching countless videos on Youtube about dairy and meat farms. The idea was simple-humans were not meant to eat animals or their products. This made sense to me-I mean, humans do not have the physical attributes to catch wild animals like other omnivores, we had to get smart enough to make arrows and knives to hunt them down. Then there is the milk and dairy product thing-you have to get a cow pregnant just to get her milk! Of course there were the studies that showed saturated fat was the devil and the less you ate, the longer you lived.
So I was all happy and content on my animal "less" (always had a hard time staying away from the ice cream and cheese!) life, then 2 initially un-related things happened. 1. I decided to stop being told to vaccinate and do my research on the actual "big deal " of vaccinations. and 2. I decided to finally do something about all my cavities that have been getting progressively worse since the birth of my son.
It didn't take me long to realize vaccines are gross and filled with nasty chemicals I wouldn't want around my son let alone injected into his blood stream. And it only took 2 teeth being filled to decide I wasn't filling anymore! These two seemingly un related subjects actually had one major thing in common-Diet.
If I wasn't going to vaccinate ( I am being brave admitting this as I know it is a controversial subject) and I didn't want anymore fillings, what would I do to be naturally healthy enough to not worry about infectious disease or a root canal?? That's what brought me to Nourishing Traditions, a "cookbook that challenged the politically correct nutrition and diet dictocrats."
I should stop here and say, that I have recently read a lot of information about the effectiveness and immunity "shelf life"of vaccinations. Enough for me to feel comfortable knowing opting out of them wasn't putting my son or anyone else at risk. So it really was just a matter of being able to put my family in the position to be strong enough health-wise to prevent and fight off common illnesses and stop using doctors as a crutch of sorts to relieve our diet-induced aliments-such as tooth decay!
The book Nourishing Traditions By Sally Fallon sums up a study conducted by Dr Weston Price in the 1930's!!! (Hello 80 + years ago people!!) Dr Price was infact, a dentist who traveled the world studying the traditional (or never industrialized/processed/commercialized) diets of people all over the world. His findings concluded that teeth were never meant to decay, and that by simply following a traditional and un-processed diet transferred into perfectly straight, white teeth (no brushing even needed) and superb disease-free physical condition throughout life.
While each civilization had different diets based on their location, they all had a few key things in common that Price and Sally Fallon from the Price foundation (author of Nourishing Traditions) would come to promote as essential to being healthy. These commonalities included:
1. A diet rich in saturated fat and cholesterol (from healthy pasture raised animal)
2. Proper preparation of whole un-processed grains and legumes
3. High intake of vitamin A and D
4. Lacto-fermented products
(More on these 4 key components of the traditional diet later.)
Of course, this book sites several studies that show saturated fat and cholesterol are not to be feared. Their point that humans have lived healthy for thousands of years of the land and animals and never seen such diseases such as heart disease and cancer until the introduction of processed and refined foods makes total sense. The more I have searched the internet for info on Traditional Dieting the more I realize, this is also a highly controversy subject! It seems to be The China Study (the main study all vegetarians often reference) vs. the Weston Price Study.
This diet seems a little "extreme" at first as there are very strict guild lines about the quality and preparations of your food. It is about making EVERYTHING from scratch and involves much preparation and forethought. However, a I am beginning this new journey and can easily say the first step to becoming healthier-whether by eating more traditionally or not is ditching the packaged foods.
I encourage you to take a look into traditional dieting! Not because I think you should embrace it, but because it is something that has really been brushed behind a curtain and never talked about on tv and in mainstream books. It is something worth looking into if you already eat animal products or have only heard one side of the food story.
Wednesday, October 5, 2011
Healthy Habit #25-Organize Your Photos!

Let's face it, having infants, toddlers and kids in general we all know how much clutter photos can cause. Whether on your computer in 5 million different files or more likely simply in you iphoto library, or in hundreds of boxes or more likely the envelopes they were sent to you in laying around the house-they really add up! I actually had over 1000 photos from Teddy's first 3 days of life!!
Here are some reasons to organize your photos:
Neatly matted and framed photos warm our home and create personalized decor for each room.
Organized photos give us the freedom to find our precious memories quickly.
Organized photos to share with guests and browse through occasionally will give you more joy in your life.
Organized photos will release you of the guilt of not having printed or preserved your precious memories.
and of course, a sense of control that you are not behind or swimming in photos, that it is done!
How to organize your photos:
Decide how you are most comfortable preserving your memories. For some it may be organized folders in a special folder on your desktop and backed up on a hard drive. For others it may be good old fashioned photo albums. Any yet others may decide to create digital photo albums to be printed. Gather your supplies as needed.
Create a space in your home and a day of the month (or for some of us- day of the week) to work on your albums. Having frames, albums and scrapbook supplies on hand will make it easier to complete your photo projects and help motivate you to work on your photos consistently.
Gather up all the loose photos in your home and organized them chronologically or by event. You can also organize by theme, such as 'holiday', 'summer'. 'travel'. While doing this, keep a trash can handy for the photos that aren't good enough to preserve and a "give away" box for duplicates or photos that grandma might like.
Make a point to pull out the one-of-a-kind photos that you know you will cherish forever and enlarge and frame them for a special spot in your home.
This can be overwhelming, but it can also be fun and a chance for you to be creative and have some quiet time for yourself!
Weelicous Crock Pot Lasagna

2 Cups Zucchini, Broccoli, Cauliflower, Mushrooms and/or Spinach
1 15 oz Container Ricotta Cheese
1/2 Cup Parmesan Cheese, grated
1 Tbsp Dried Italian Herbs
1/2 Tsp Garlic Powder
1 Tsp Kosher Salt
1 Large Egg
1 25 oz Jar Pasta Sauce
1 Box Lasagna Noodles (uncooked)
2 Cups Mozzarella Cheese, grated
1 15 oz Container Ricotta Cheese
1/2 Cup Parmesan Cheese, grated
1 Tbsp Dried Italian Herbs
1/2 Tsp Garlic Powder
1 Tsp Kosher Salt
1 Large Egg
1 25 oz Jar Pasta Sauce
1 Box Lasagna Noodles (uncooked)
2 Cups Mozzarella Cheese, grated
1. Place the vegetables in a food processor and pulse to roughly chop.
2. Place the ricotta, parmesan cheese, herbs, garlic powder, salt and egg in a bowl and stir to combine.
3. Pour half of the pasta sauce in the bottom of a crock pot.
4. Place a layer of noodles on top of the sauce, covering the entire surface, breaking the noodles to fit the pot.
5. Layer half of the ricotta mixture on top of the noodles, followed by 1 cup of the chopped vegetables and then one cup of mozzarella cheese.
6. Repeat with another layer of noodles, followed by the remaining ricotta mixture and the chopped vegetables.
7. Pour the remaining pasta sauce on top of the lasagna and top with the remaining cup of the grated cheese.
8. Cook on low for 4 hours.
9. Serve.
2. Place the ricotta, parmesan cheese, herbs, garlic powder, salt and egg in a bowl and stir to combine.
3. Pour half of the pasta sauce in the bottom of a crock pot.
4. Place a layer of noodles on top of the sauce, covering the entire surface, breaking the noodles to fit the pot.
5. Layer half of the ricotta mixture on top of the noodles, followed by 1 cup of the chopped vegetables and then one cup of mozzarella cheese.
6. Repeat with another layer of noodles, followed by the remaining ricotta mixture and the chopped vegetables.
7. Pour the remaining pasta sauce on top of the lasagna and top with the remaining cup of the grated cheese.
8. Cook on low for 4 hours.
9. Serve.
Chewy Oat Nuggets-Thanks Telly!
This recipe is from Feeding Baby Green. Daniel loves these “cookies”. Not only are they delicious but are good for you, especially if you use the walnuts which are full of omega 3 fatty acids. The sweetness is supplied by the bananas only, so be sure to pick ripe ones!
Ingredients
2½ cups steel-cut oats
¾ cup walnuts, pecans, or macadamia nuts
¼ teaspoons salt (optional)
2¼ cups sliced bananas (4 large bananas)
1 teaspoon cinnamon
¼ cup walnut oil
Preparation
1. Preheat the oven to 400 degrees.
2. Put steel-cut oats, salt, cinnamon, and walnuts in the work bowl of a food processor. Process until the mixture it looks like flour.
3. Add the bananas and walnut oil. Process until well mixed.
4. Drop by the spoonful onto a greased baking sheet and bake for 8 to 10 minutes or until lightly golden.
Peanut Butter Oat Nuggets:
Omit the nuts, add 2 tablespoons of crunchy or creamy peanut butter, and substitute peanut oil for the walnut oil.
Sun Butter Oat Nuggets:
Omit the nuts, add 2 tablespoons of sunflower seed butter, and substitute sunflower seed oil for the walnut oil.
Serves 12 (Yield: 4 dozen)
NUTRITION FACTS (AMOUNT PER SERVING)
Calories: 252 Total Fat: 1O.51g
Cholesterol: 0 Sodium: 49mg
Total Carbs: 32.12g Dietary Fiber: 5.19g
Sugars: 5.25g Protein: 7.84g
Quinoa Corn Salad
1 C raw quinoa
1 T olive oil
1 t paprika
3 C water
1 t salt (I left this out)
2 C fresh or frozen corn kernels
2 T olive oil
1 large onion, finely chopped (about 2 C)
2 garlic cloves, minced or pressed
1 t ground cumin
1 t ground coriander
2 red and/or green bell peppers, seeded and diced
1 fresh chile, stemmed, seeded and minced
2 T minced fresh cilantro, or more to taste
1 large tomato, chopped
2 T minced fresh parsley
1/4 C fresh lemon juice
ground black pepper
In a sieve, rinse the quinoa under running water and set aside to drain. Heat 1 T oil in a saucepan, add the paprika, and stir for a minute. Add the quinoa, 2 C of the water, and the salt. Cover, and bring to boil; then simmer for 15 to 20 minutes, or until the water is absorbed and the quinoa is tender but still chewy.
Meanwhile, in a separate pot bring the remaining 1 C water to a boil. Add the corn and cook until tender, drain well, and set aside in the refrigerator. Heat the oil and saute the onions, garlic, cumin, and coriander until the onions are translucent, about 10 minutes. Stir in the bell peppers, chile, and cilantro, and saute for another 3-5 minutes.
In a large serving bowl, combine the cooked quinoa and the sauteed vegetables and chill for 15 minutes. Stir in the corn, tomatoes, parsley, and lemon juice, and season with salt and black pepper. Add more chopped cilantro, if desired, and serve immediately or refrigerate.
Saturday, October 1, 2011
Basic Granola Bar Formula
Basic Granola Bar Formula
1. Rolled Grains (2½ cups)
Suggestions: Oats, Rye flakes, Barley flakes, etc.
Suggestions: Oats, Rye flakes, Barley flakes, etc.
2. Nuts, Seeds & Spices (1 cup)
Suggestions: Almonds, Walnuts, Pecans, Pistachios, Sunflower Seeds, Pumpkin Seeds, Cinnamon, Ginger, etc.
Suggestions: Almonds, Walnuts, Pecans, Pistachios, Sunflower Seeds, Pumpkin Seeds, Cinnamon, Ginger, etc.
3. Sticky Sweetener (1/3 cup + ¼ cup)
Suggestions: Honey, Agave Nectar, Molasses, Maple Syrup
Suggestions: Honey, Agave Nectar, Molasses, Maple Syrup
4. Dried Fruits (1 cup)
Suggestions: Raisins, Apricots, Dates, Figs, Prunes, Cranberries, Pineapple, etc.
Suggestions: Raisins, Apricots, Dates, Figs, Prunes, Cranberries, Pineapple, etc.
5. Binder (1 cup)
Suggestions: Pureed Dried Fruit, Apple Butter, Peanut Butter, Almond Butter, Unsweetened applesauce, etc.
Suggestions: Pureed Dried Fruit, Apple Butter, Peanut Butter, Almond Butter, Unsweetened applesauce, etc.
Fig, Date & Almond Granola Bars
Yield: 8 to 12 bars, depending on how large you cut them
Prep Time: 15 minutes | Bake Time: 25 minutes
1 cup unsweetened applesauce
1/3 + ¼ cup honey
1 teaspoon ground cinnamon
¾ teaspoon vanilla extract
2½ cups rolled oats
1 cup chopped almonds
1/3 cup chopped dried figs
1/3 cup chopped dried dates
1/3 cup raisins
1/3 + ¼ cup honey
1 teaspoon ground cinnamon
¾ teaspoon vanilla extract
2½ cups rolled oats
1 cup chopped almonds
1/3 cup chopped dried figs
1/3 cup chopped dried dates
1/3 cup raisins
1. Preheat oven to 325 degrees F. Line an 8×8-inch baking pan with parchment paper.
2. In a large bowl, whisk together the honey, applesauce, cinnamon and vanilla extract. Stir in the oats, making sure that it is evenly mixed and all of the oats are moistened. Mix in the almonds, figs, dates and raisins.
3. Turn the mixture out into the baking pan and press into the pan, making sure it is evenly distributed and tightly packed.
4. Bake for 25 minutes. Remove from the oven and cool in the freezer until the bars are firm, at least 1 hour. Remove from the pan and cut into bars. Store in an airtight container for up to 1 week.
Recipe Note: I experimented with this recipe using both traditional rolled oats and quick oats. I tended to like the consistency of the bars with the quick oats, but I had my mom taste both and she liked the traditional rolled oats better. So I think it’s a matter of taste/preference. Give them both a shot (or use what you have on hand) and see which you like better!
Subscribe to:
Posts (Atom)